Manage Data Links
Revit ↔ Excel Sync in G.plus
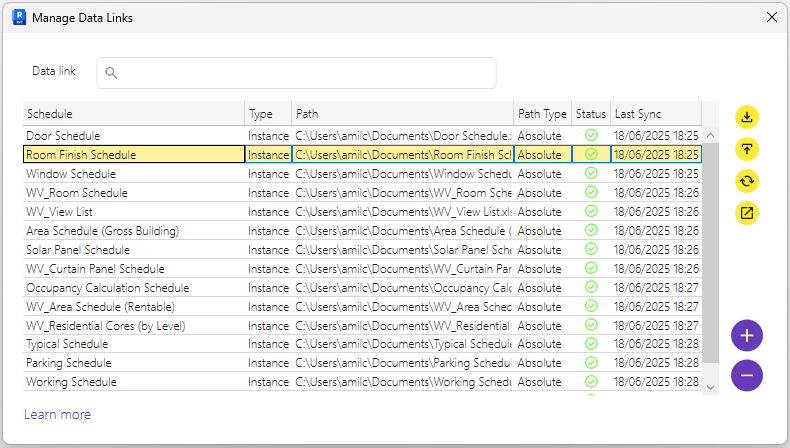
The Manage Data Links window is where you control the connections between Revit schedules and Excel spreadsheets.
Main Table
Each row in the table represents a live link between a Revit schedule and an Excel file. These links allow you to sync model data with external spreadsheets — useful for stakeholders who work outside of Revit.
| Column | Description |
|---|---|
| Schedule | The Revit schedule being linked |
| Type | Indicates whether the link targets Instance or Type parameters |
| Path | The file path of the linked Excel sheet |
| Path Type | Shows whether the path is Absolute or Relative |
| Status | Indicates whether the Excel file is accessible and synced |
| Last Sync | Timestamp of the most recent synchronization |
Right-side Actions (Sync Tools)
Each icon performs a sync action for the selected link:
- Pull — Updates the Revit schedule using the Excel file
- Push — Overwrites the Excel file with current Revit data
- Sync — Performs a smart two-way sync (based on changes)
- Compare — Opens a merge interface to review and resolve differences
Add or Remove Links
- Removes the selected link from the list
- Adds a new link between a Revit schedule and an Excel file
💡 Use this tool to connect your BIM model with quantity takeoffs, asset registers, or room data sheets managed externally — without breaking the Revit workflow.
Add a New Data Link
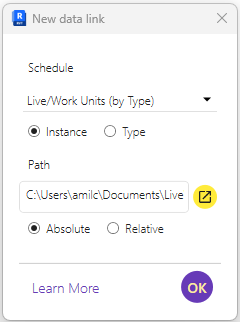
To create a new connection between a Revit schedule and an Excel file, click the Add button in the main interface.
This opens the New Data Link dialog:
Configuration Options
| Field | Description |
|---|---|
| Schedule | Select an existing Revit schedule you want to link with Excel |
| Parameter Type | Choose whether the data exchange will act on element Instance or Type parameters |
| Path | Browse to select the Excel file (.xlsx) you want to link. Use the yellow folder button to open the file picker |
| Path Type | Absolute (Stores the full path to the file) or Relative (Stores a path relative to the Revit project location) |
Finalize the Link
Once all fields are configured:
- Click the OK button (purple circle) to create the link.
- The new link will appear in the Manage Data Links table, ready for push/pull/sync actions.
- The data will be pushed to the linked Excel file.
💡 You can create an Instance and a Type link for the same schedule.
💡 You can link multiple Revit schedules to the same Excel file, but it will need a different sheet for each link.
General Notes
-
Push Overwrites Everything
When you push data to Excel, the entire content of the linked sheet will be replaced by the current Revit schedule. Any manual changes in Excel will be lost unless pulled beforehand. -
Pull Respects Read-Only Parameters
When you pull data from Excel, only writable parameters will be updated in Revit. Read-only fields (e.g., calculated values or system parameters) remain untouched. -
Create or Delete Elements via Excel
For supported categories like Rooms, Spaces, Areas, and Sheets, you can: - Add new elements by inserting new rows in Excel
-
Remove elements by deleting rows
-
Dynamic Column Mapping
If you add new columns in the Excel sheet, G.plus will prompt you to: - Map them to existing parameters, or
- Create new shared parameters automatically
💡 Use these capabilities to quickly bulk-edit schedules, populate new projects, or coordinate with non-Revit users — all from Excel.
Selective Merge
The Merge window allows you to resolve conflicts between Revit data and the linked Excel file.
This ensures you don’t have to overwrite everything — just what matters.
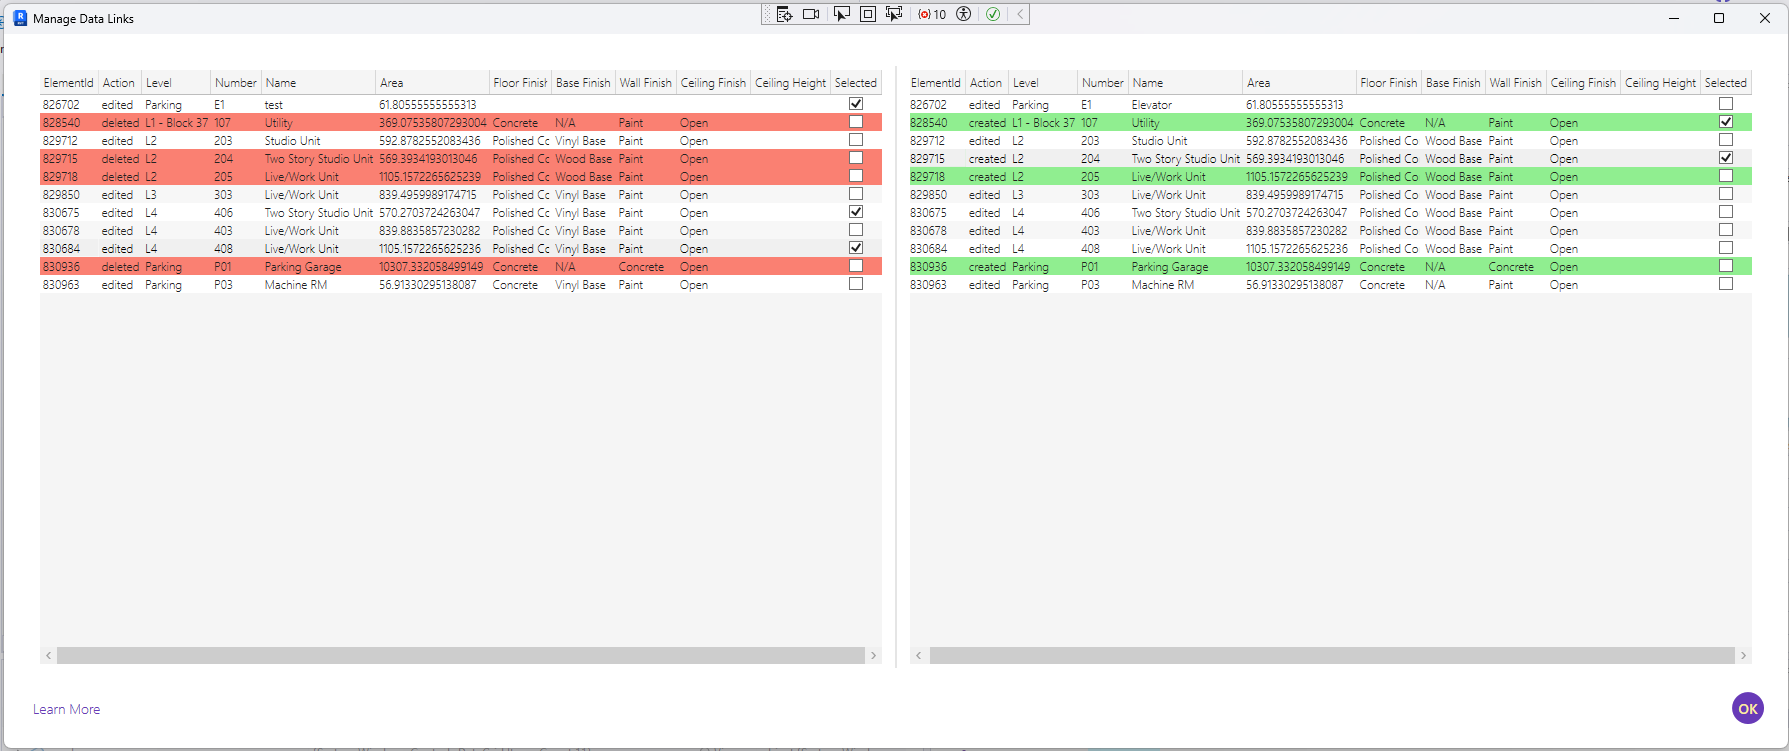
How it Works
- Left Panel: Shows the current data from the Revit model
- Right Panel: Displays the data from the Excel file
Each row represents differences in elements (e.g., Room, Space, Area, or Sheet) being compared across both sources.
Manual Conflict Resolution
- Use the checkboxes to manually select which rows to update.
- You can decide line-by-line whether to:
- Push changes from Revit → Excel
- Pull changes from Excel → Revit
This selective approach gives you granular control, avoiding full overwrites and reducing the risk of data loss.
💡 Ideal for collaborative workflows where teams update Excel files in parallel with Revit development.
Finalize Changes
After reviewing and selecting desired rows, click OK to apply the merge based on your selections.